.gif?alt=media&token=1f79b4e0-c4c9-4512-a4be-fa311ab27791)
Creating and sending an incentive with Village.
Creating and sending an incentive with Village.

A love story in the making

Accept your invite

Create an account
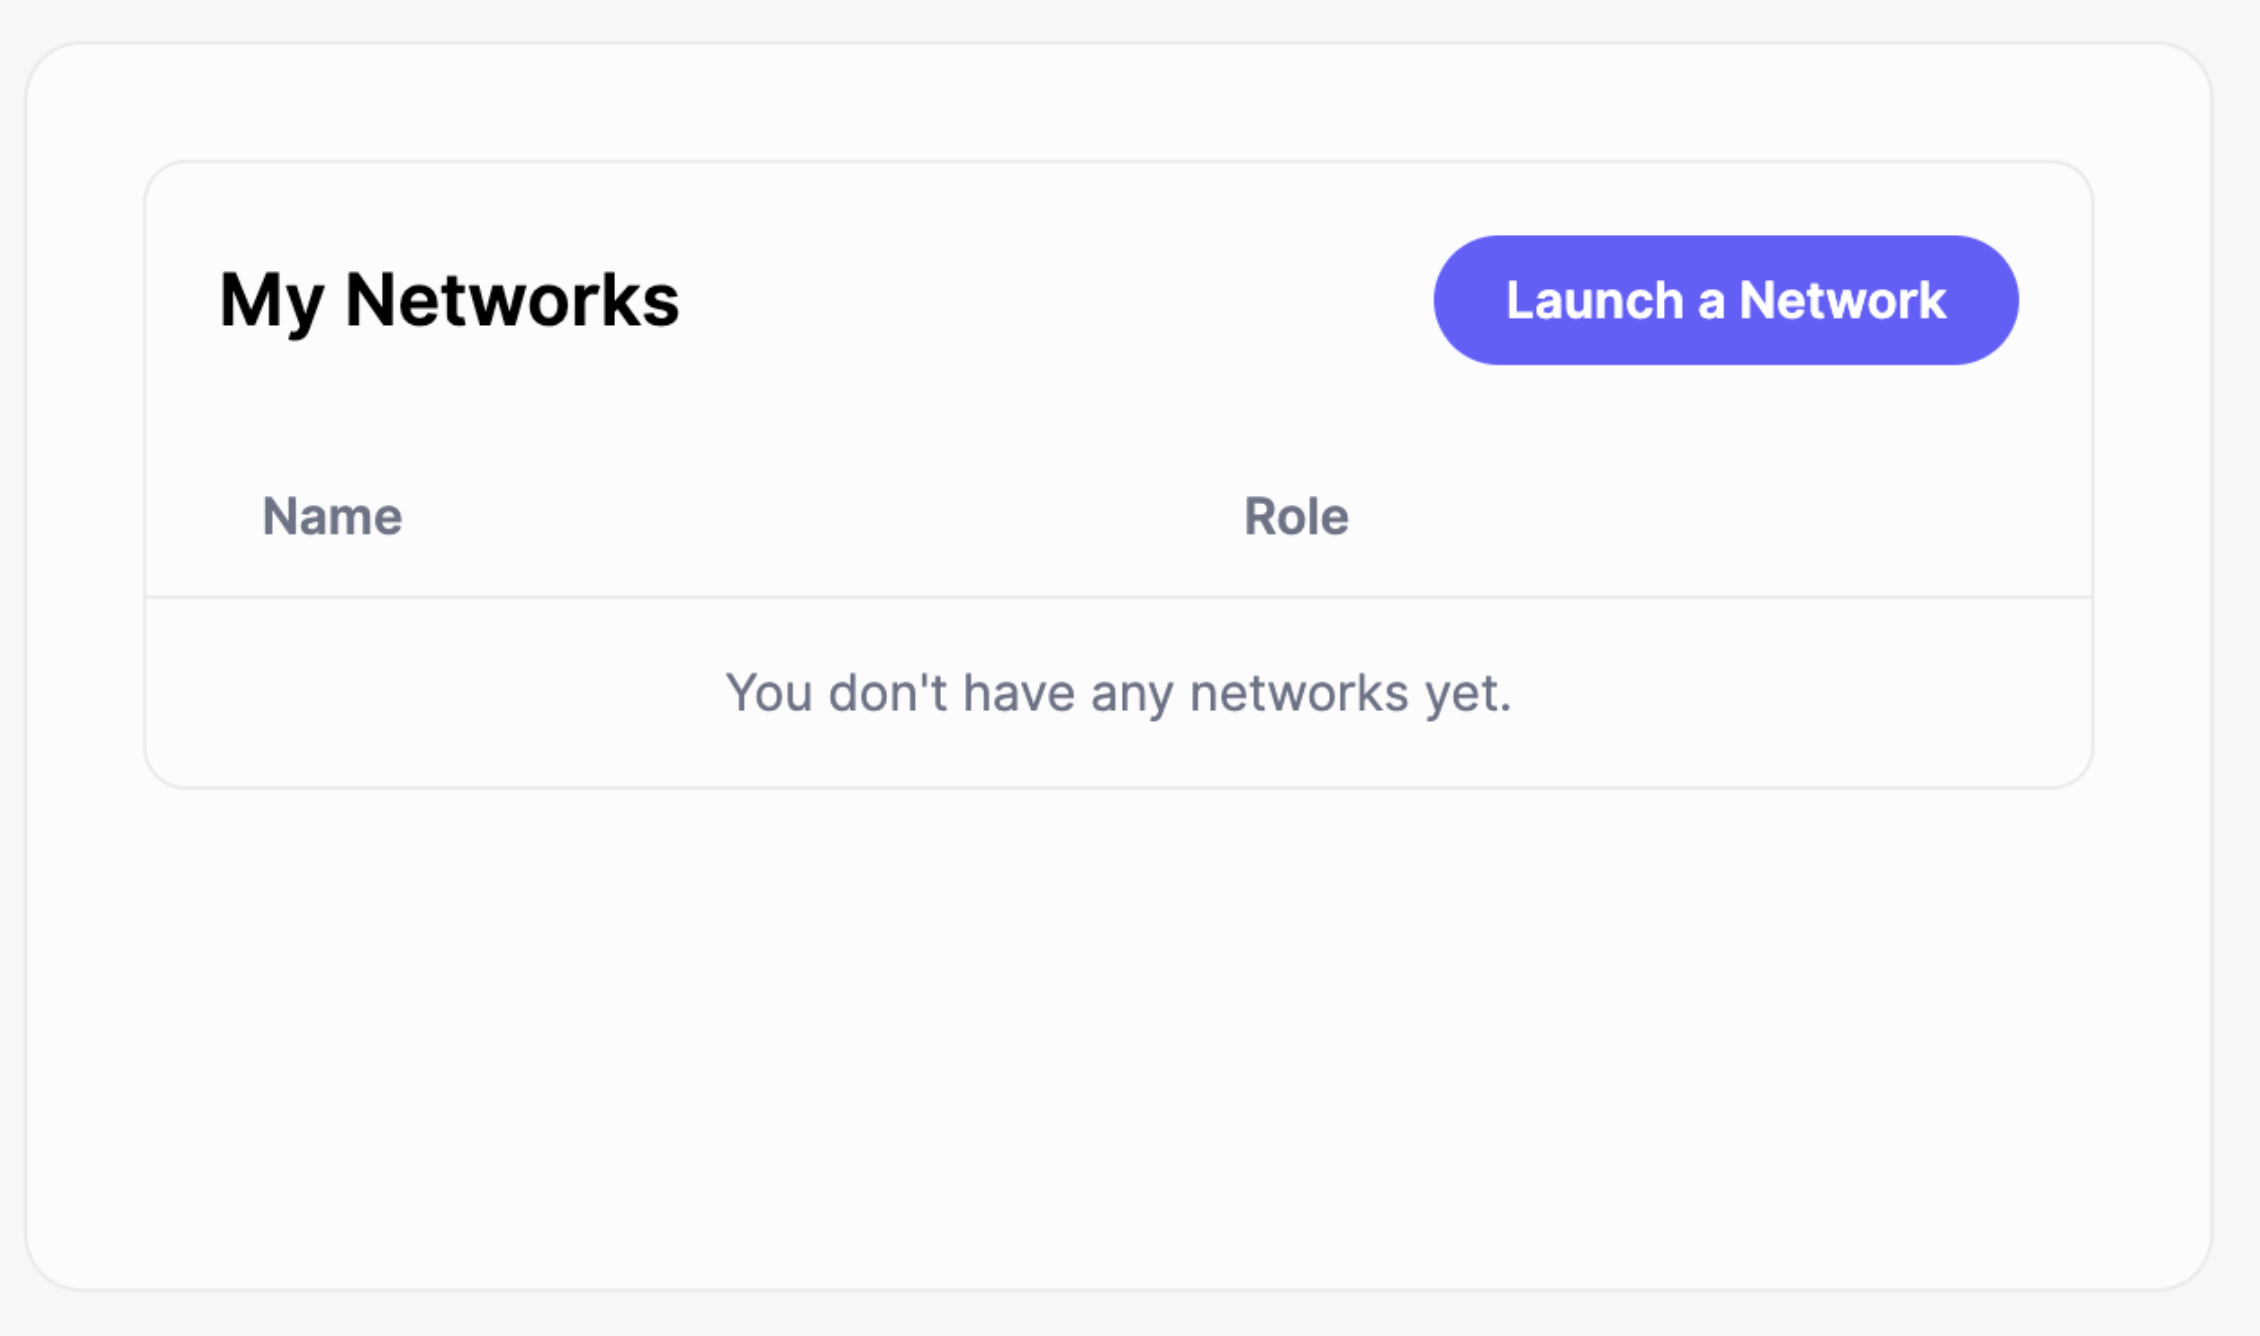
Launch Network
.png?alt=media&token=c45eb842-58cc-492a-94bc-7be6b212d76d)
Launching your network
| ID | Input | Description |
|---|---|---|
| 1 | Display Name | This is the user-facing name for your network, typically the name of your platform or company, e.g. "Nike." |
| 2 | Unique Name | This is a non-editable, unique identifier for your network. This will not be seen by users or customers, but will be used by your developer team to access the Village APIs. You cannot change this once your network is launched. |
| 3 | Description | This is a user-facing description, often the company description or tagline. It may be user-facing in some instances. |
.png?alt=media&token=606c4686-9ac3-4ffe-8c55-893c9d244756)
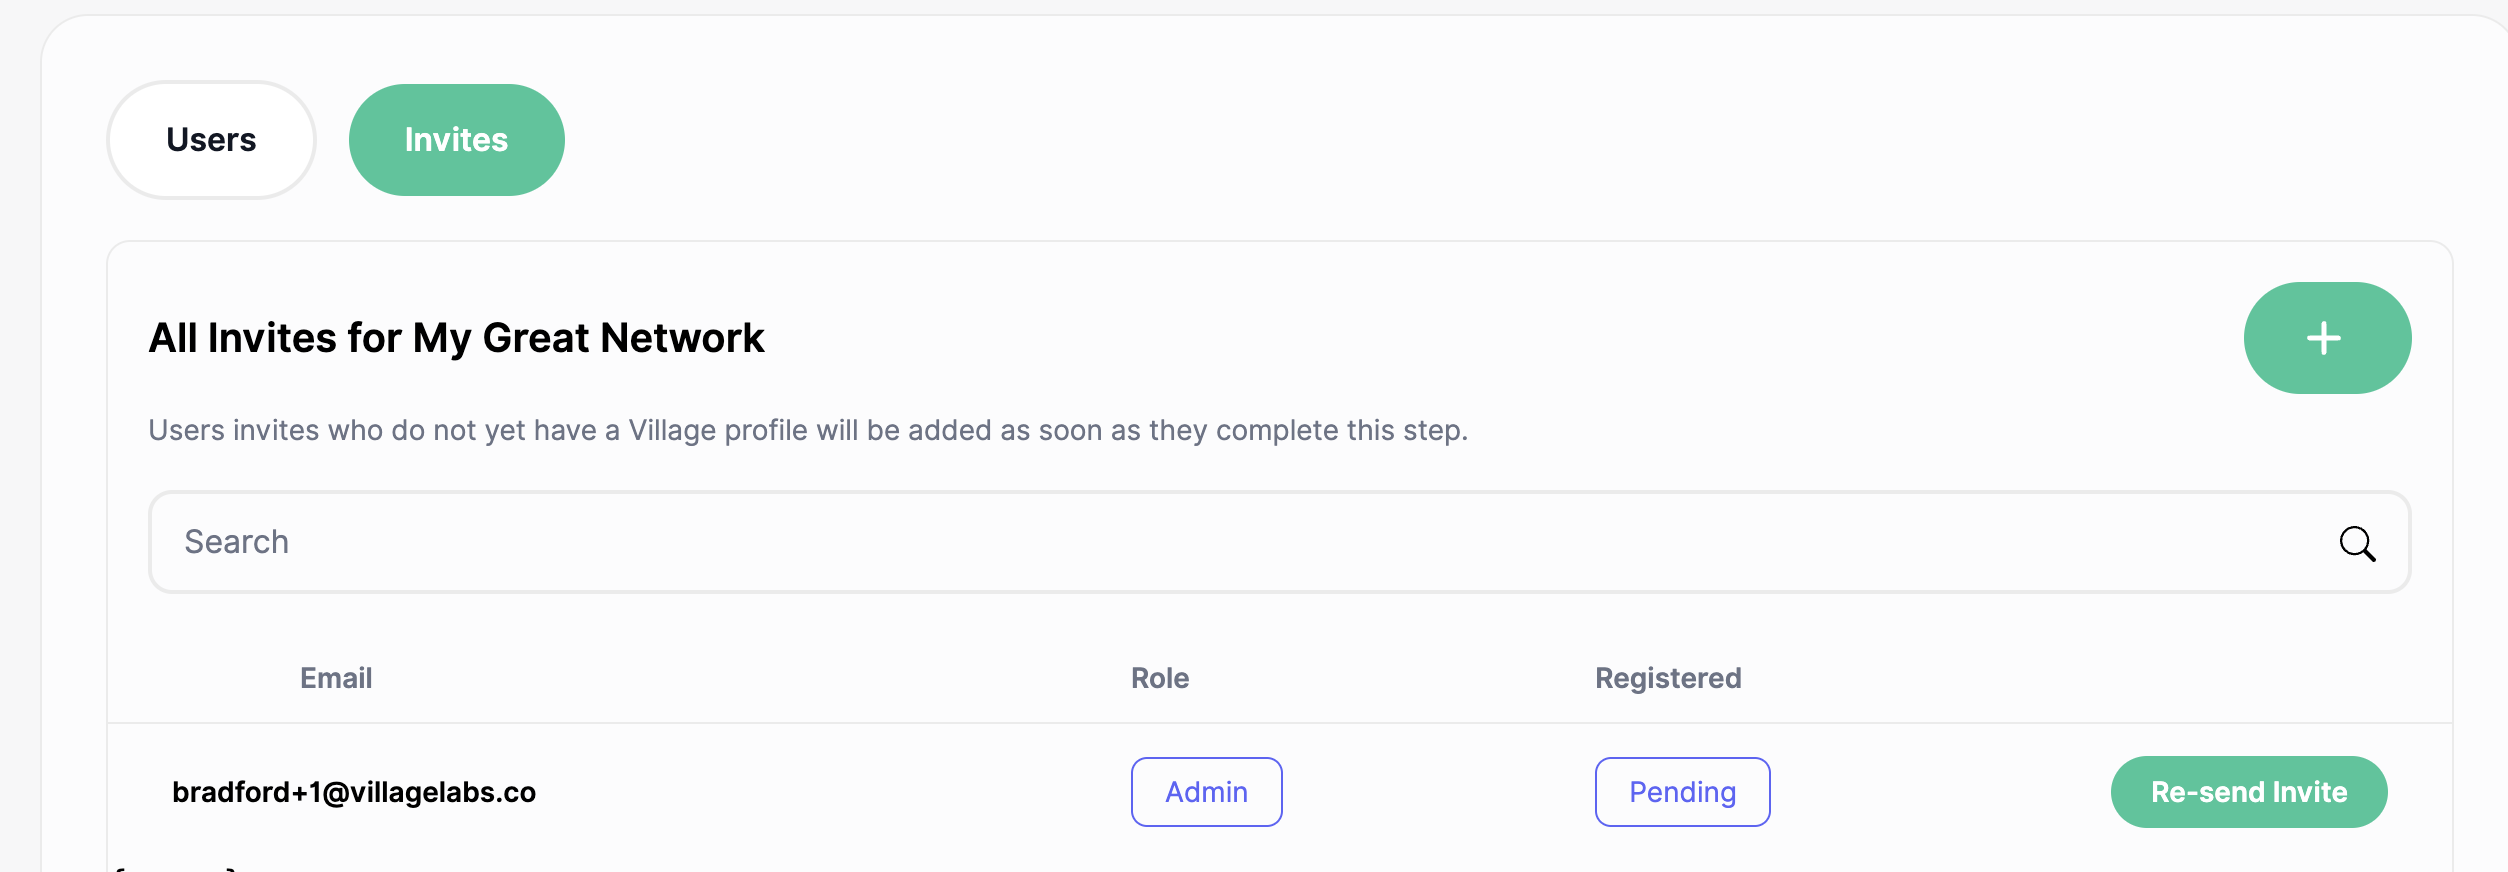
User Access


Navigate to Non-Monetary Awards

Create some Fun Points

Create a New Trigger

Dances are fun

Program Overview -> Create New Program
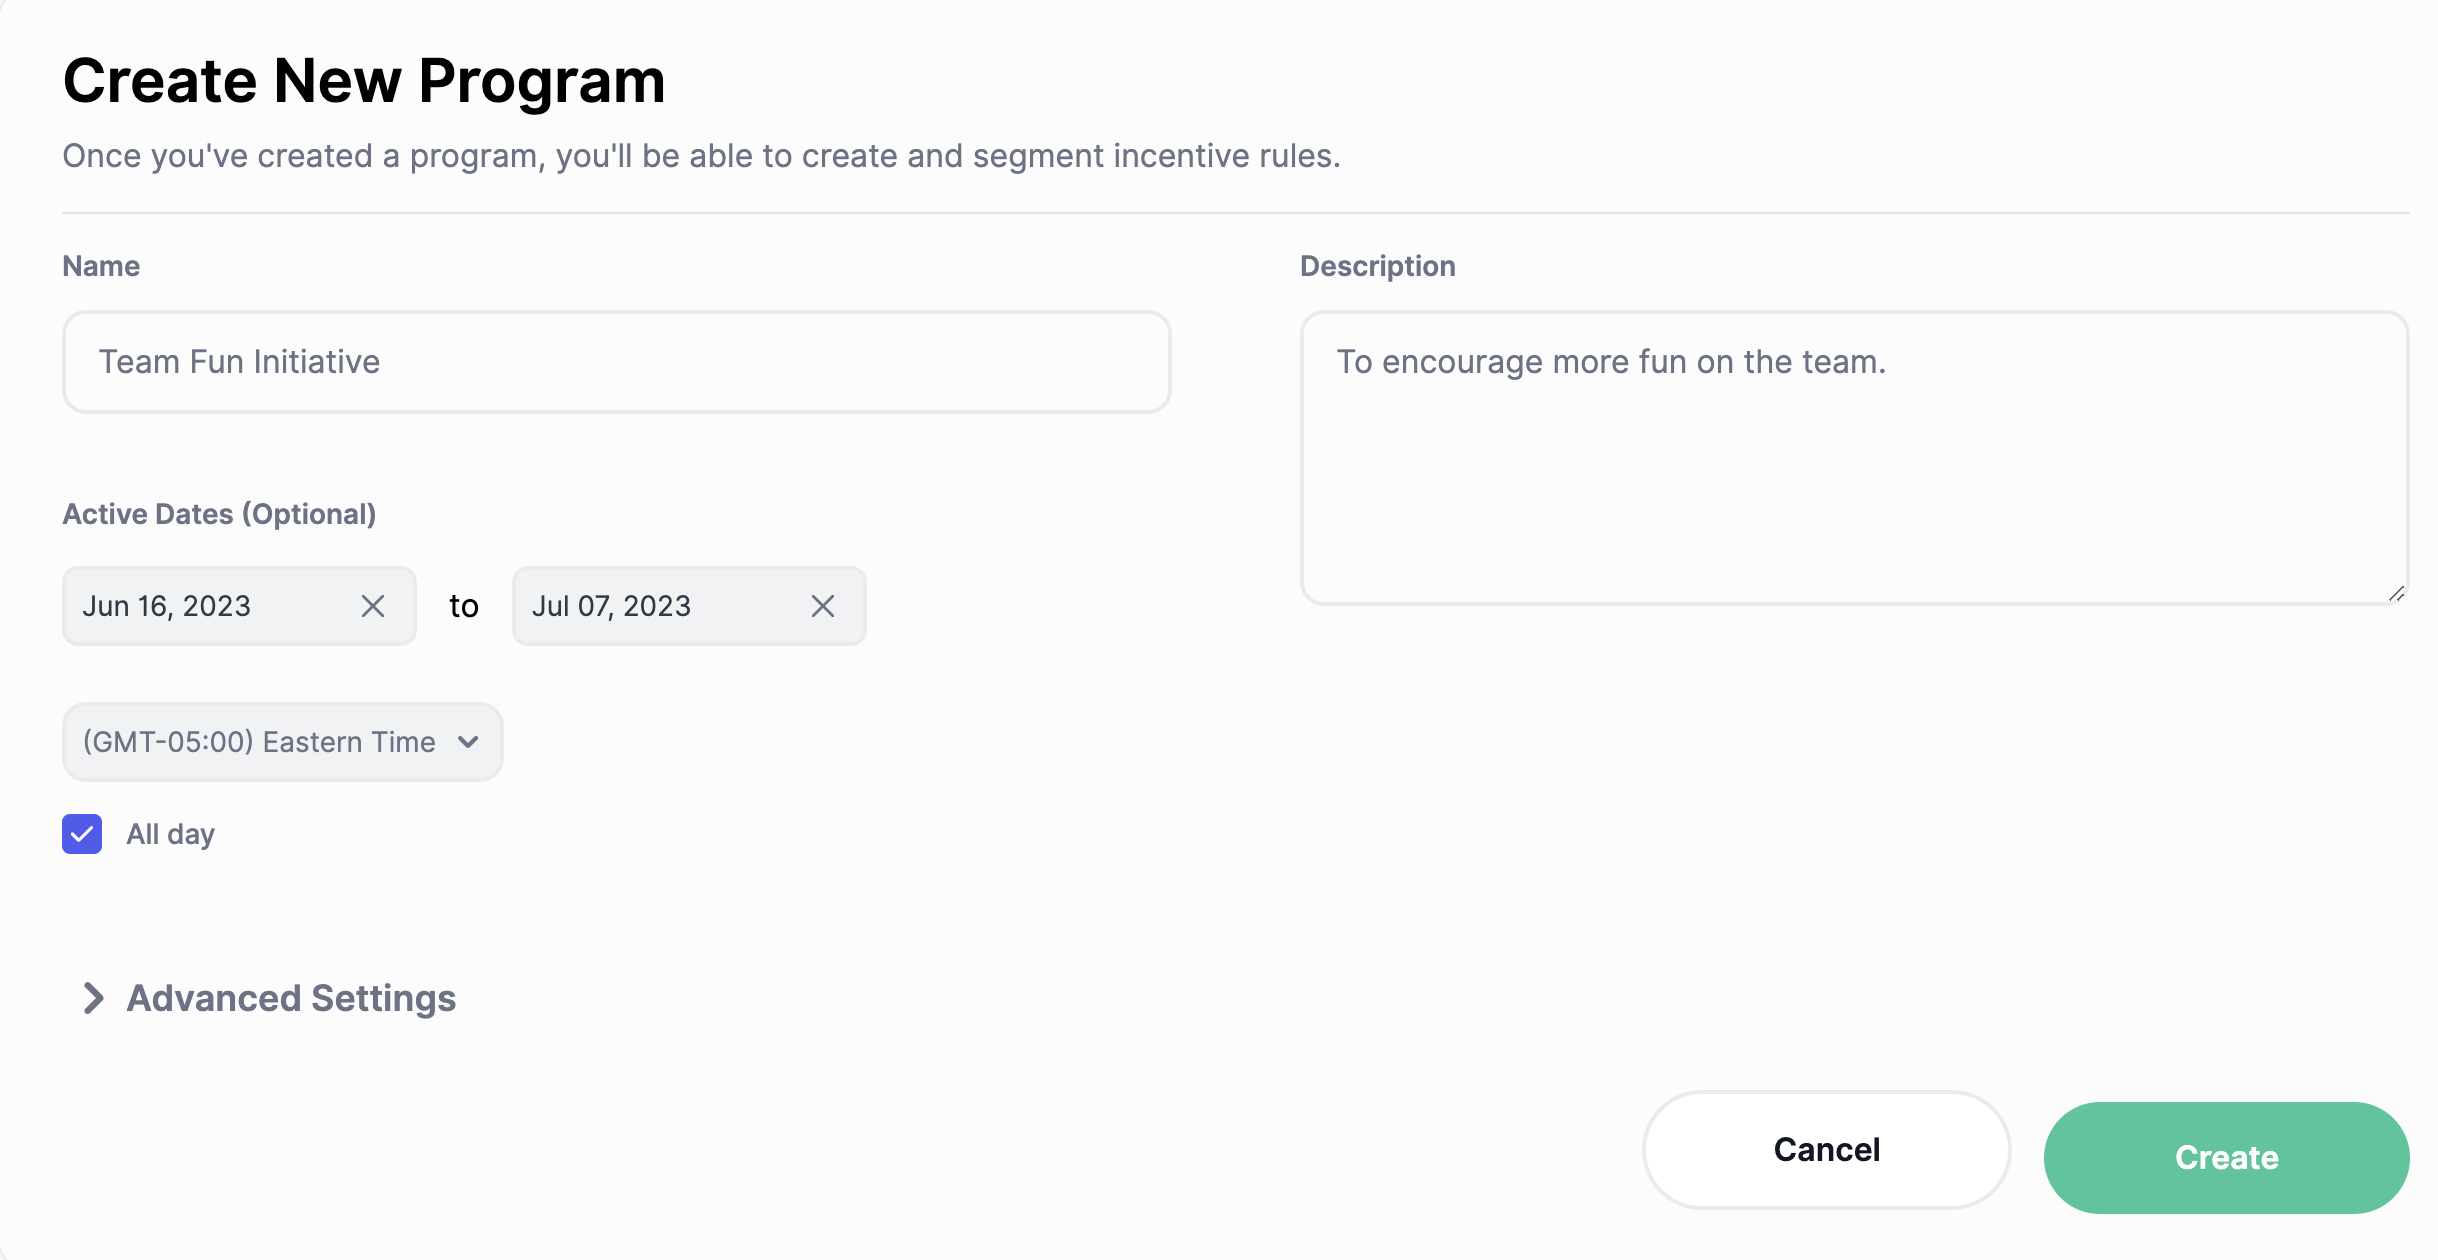
Encouraging more fun

Creating a draft rule

Comms generated based on the rules you created.
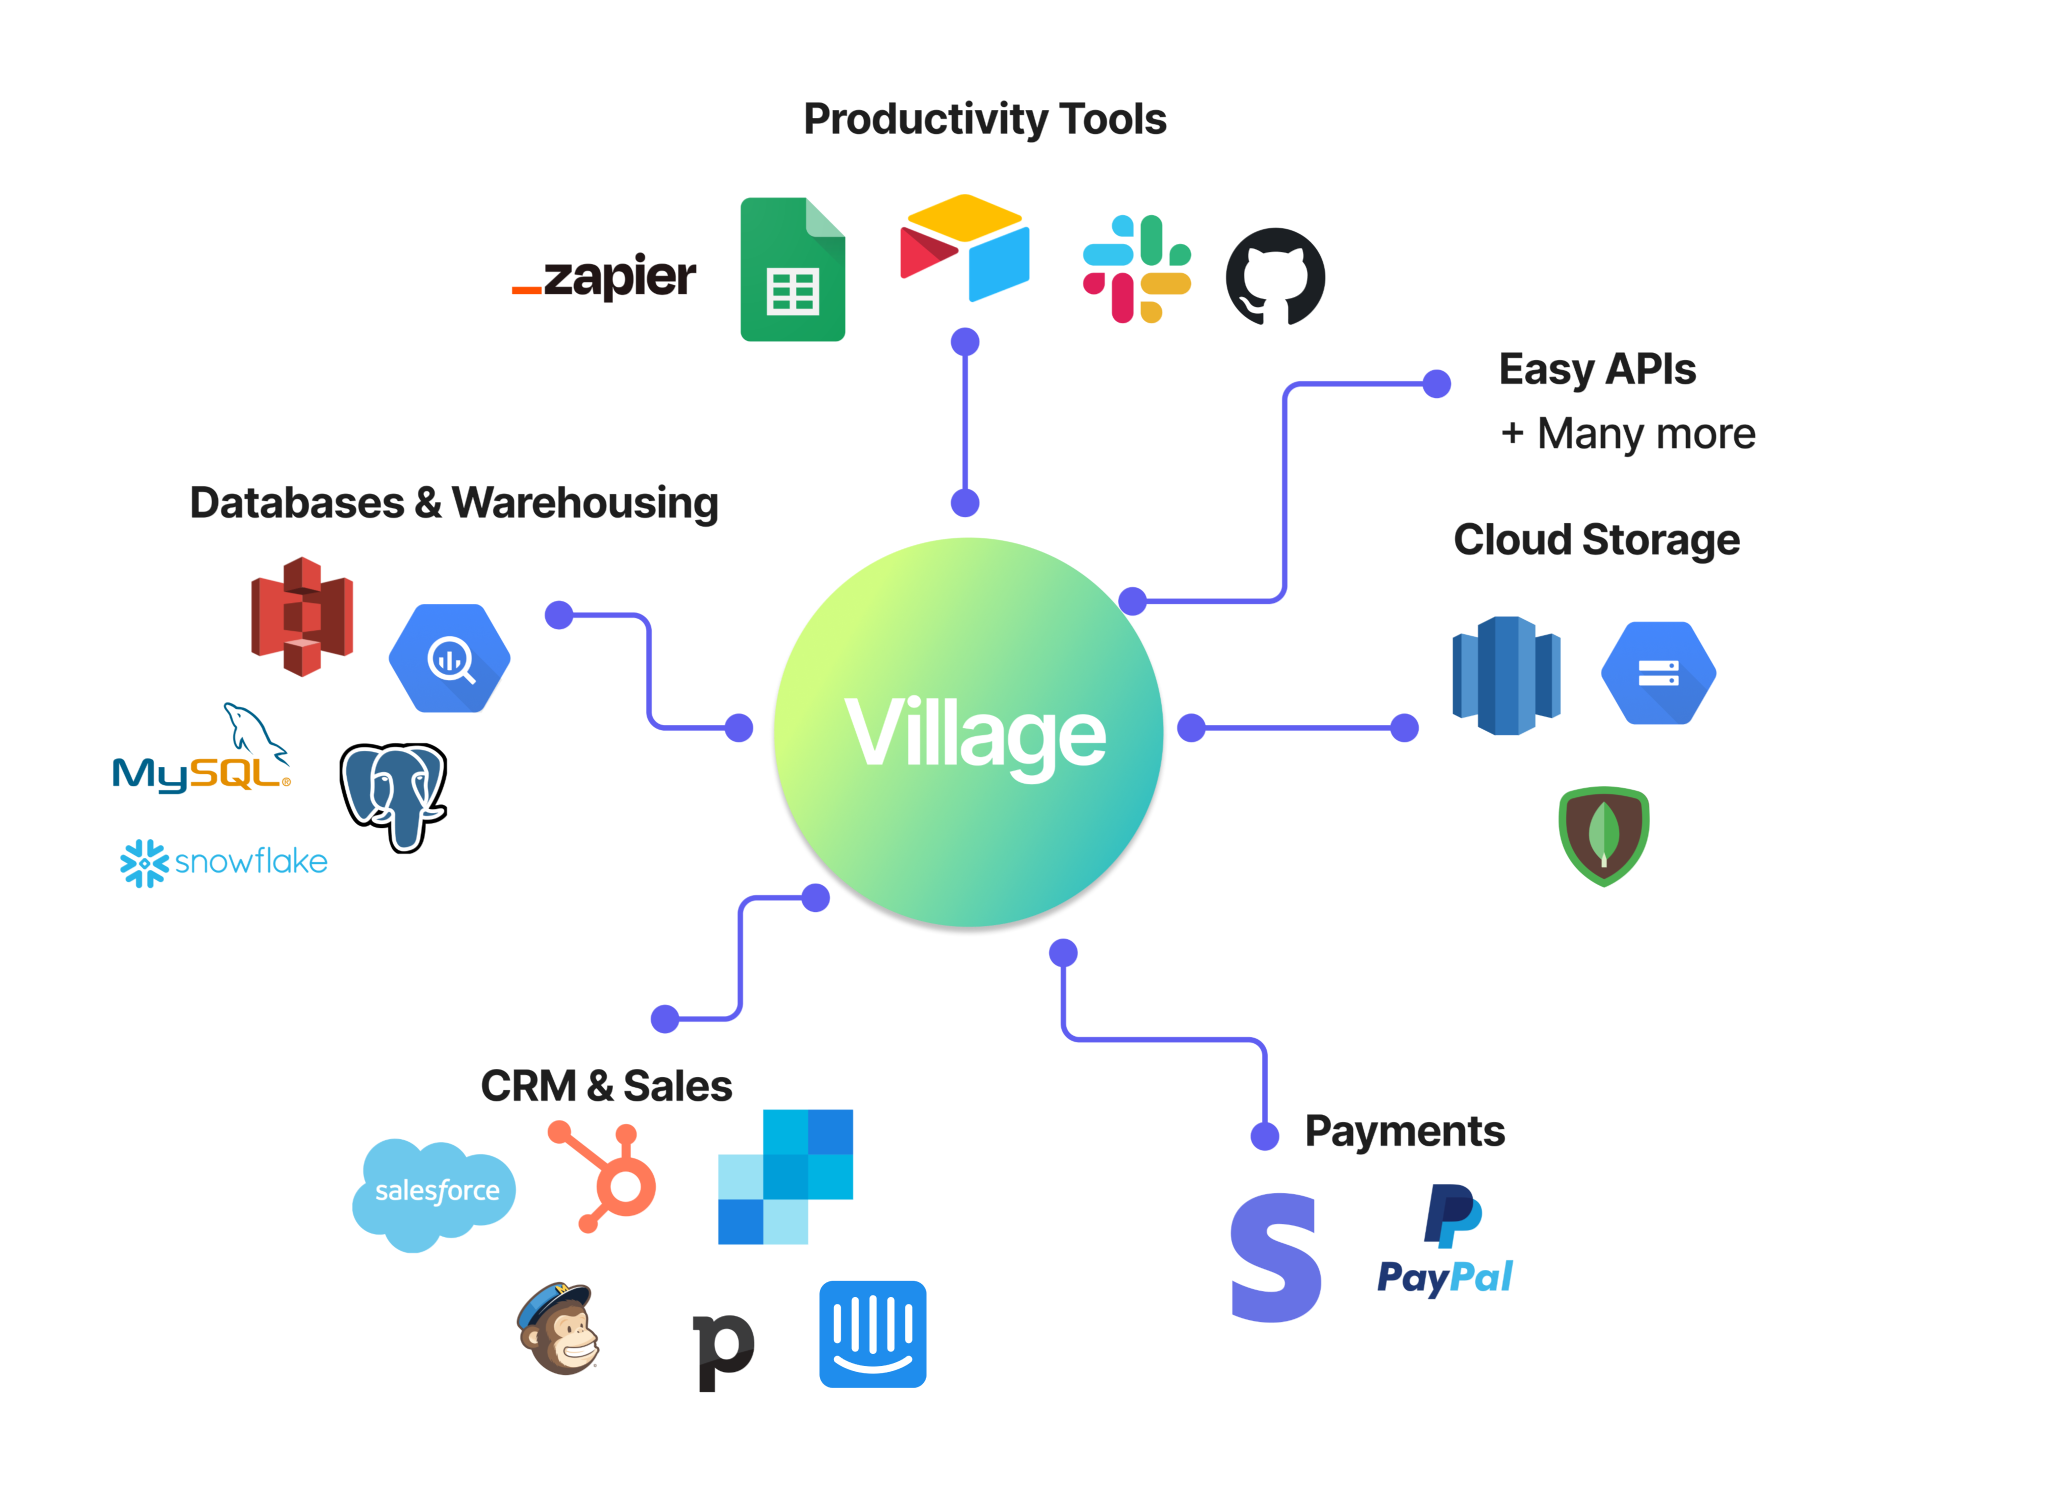
Village connects to many 3rd-party data sources.